Installing FFmpeg on Windows: A Step-by-Step Guide
Installing FFmpeg on Windows: A Step-by-Step Guide
Prerequisites
- Internet connection
- WinRAR or 7z
Download
You have two option for download (dont download both of them.):
- recommended: gyan.dev/ffmpeg
- download under
release builds. - your filename be like:
ffmpeg-release-full.7z 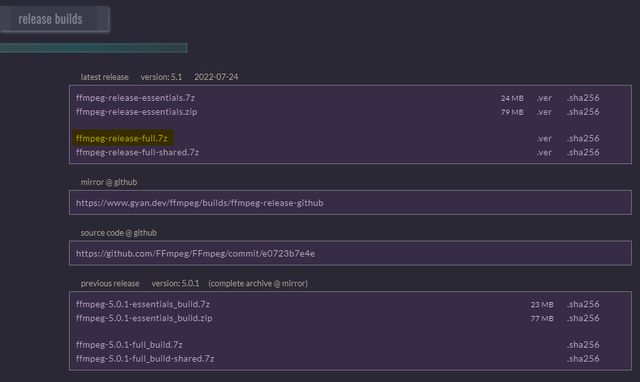
- download under
- other: BtbN/FFmpeg-Builds
- download under
assets. - your filename be like:
ffmpeg-master-latest-win64-gpl.zip 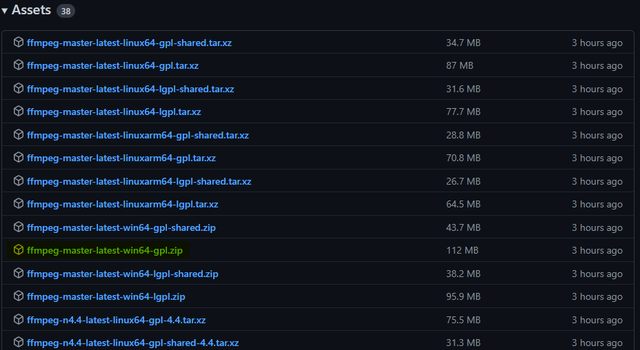
- download under
Install
- Open your downloaded file with 7z or winrar
- You will see a folder inside it
- Extract that folder to C:\
Add To Path
- Go Windows search menu
- Type
Edit the system environment variables(Turkish:Sistem ortam değişkenlerini düzenleyin) - Navigate to Advanced button and click Environment Variables:

- Find
Pathand double click: 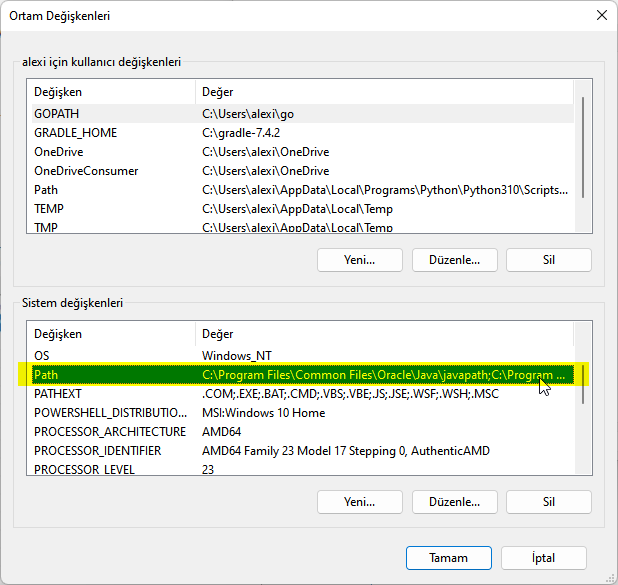
- Click
Browse: 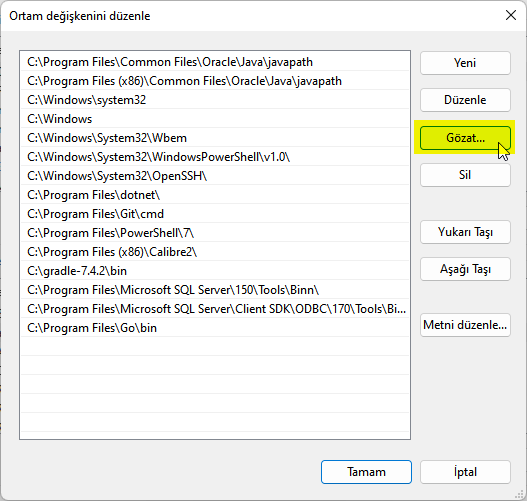
- Select your
binfolder like this: 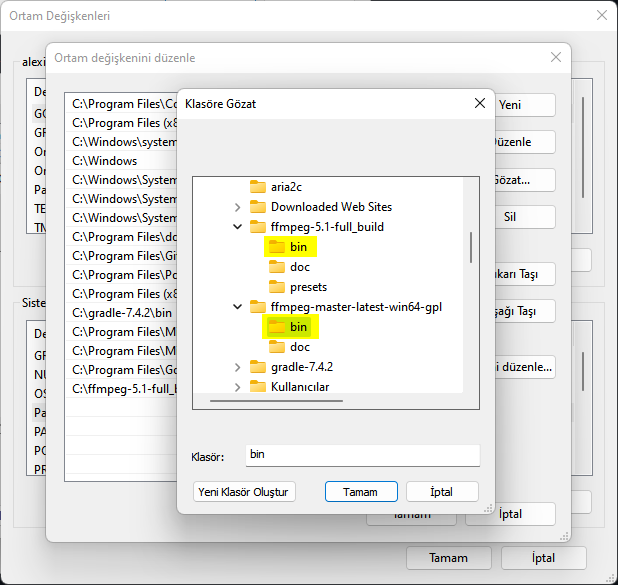
- save, save, save, save
Dont download both of them. You will have only one bin folder.
Usage
- Now open a terminal, type
ffmpegand enter. - You will see a output like this:
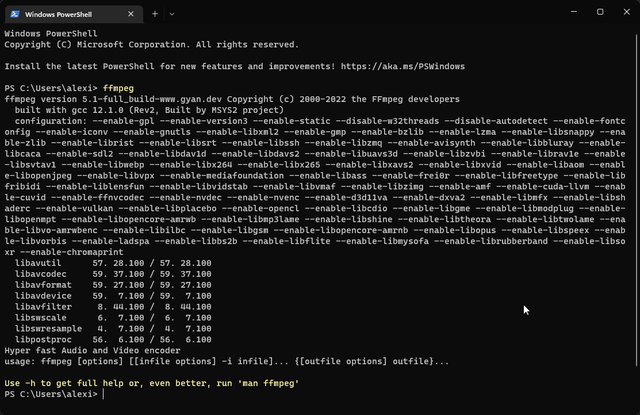
- If you dont see this output, it means you did something wrong.
- We installed ffmpeg to windows. If you dont trust links, you can check from here
This post is licensed under
CC BY 4.0
by the author.